How it started
My son really loves cubes. He has solved an 8×8 cube and even a cube said to be the hardest in the world. I tried to learn at least the 3×3, but I got stuck at step 8 of the method, and I never really understood the principles.
So I decided to build a program that draws the cube on screen, reads a real cube from photos and shows the solution one move at a time.
The 3D cube
- It is drawn with Qt6 and OpenGL. Dragging with the mouse rotates the whole cube; left-clicking a sticker turns that row left or right, and right-clicking turns it up or down.
- At first, clicking the same sticker sometimes turned the right way and sometimes the opposite way. When the cube was at an angle, it misjudged the front face and the side face. We fixed it after testing every direction with a rotation direction simulator (simulate_moves).
- Lighting and shadows made white look grey and the bottom face look black, so we removed the lighting effects.
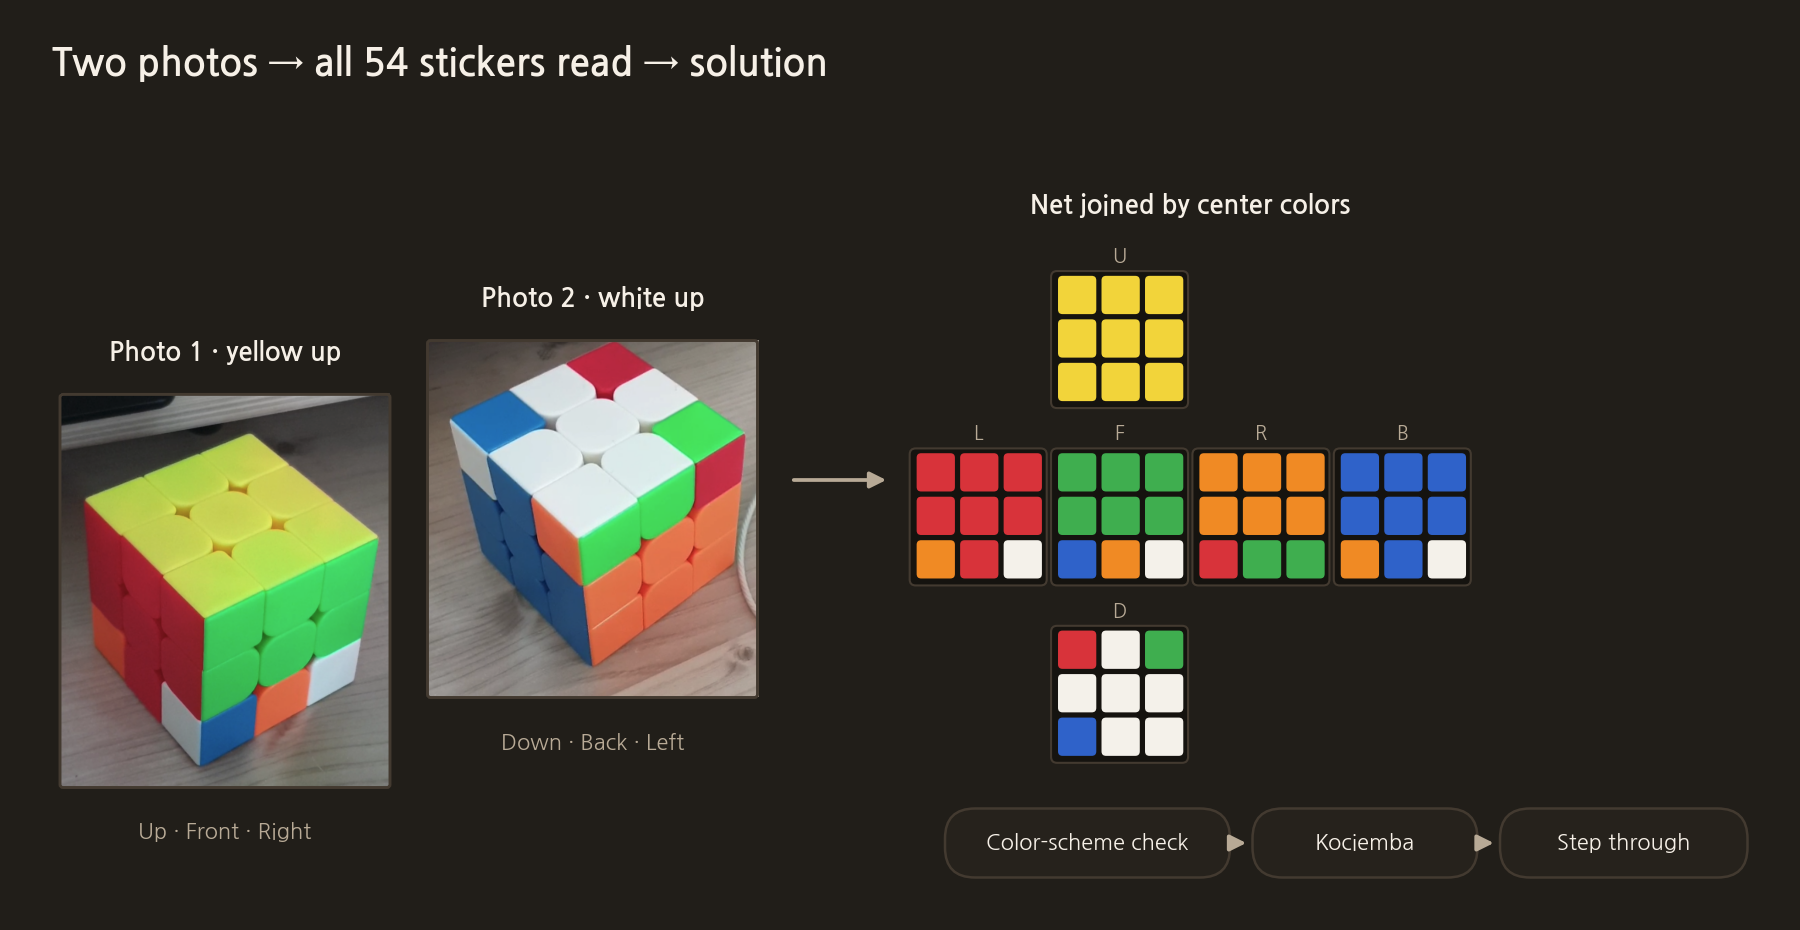
Two photos give all 54 stickers
Photographing the cube from a corner shows three faces in one picture. Another photo from the opposite corner shows all six faces.
- Photo 1: yellow on top, showing top, front and right
- Photo 2: flipped with white on top, showing bottom, back and left
The centre sticker of each face never moves when turning. So the centre colour determines which face it is. The colour scheme is yellow top, white bottom, green front, orange right, red left and blue back.
Rule checks
If a photo is misread, the result can be a cube that could never actually be assembled. So when a net comes in, we check the rules first.
- The 6 centres must have their fixed colours.
- Each of the 8 corner pieces must have three different colours, and opposite colours (yellow–white, green–blue, red–orange) can never appear on the same piece.
- The 12 edge pieces are checked the same way, and the same piece must not appear twice.
Stickers that fail are marked with a red border. Clicking one pops up a ring of the six colours around it so it can be fixed right away.
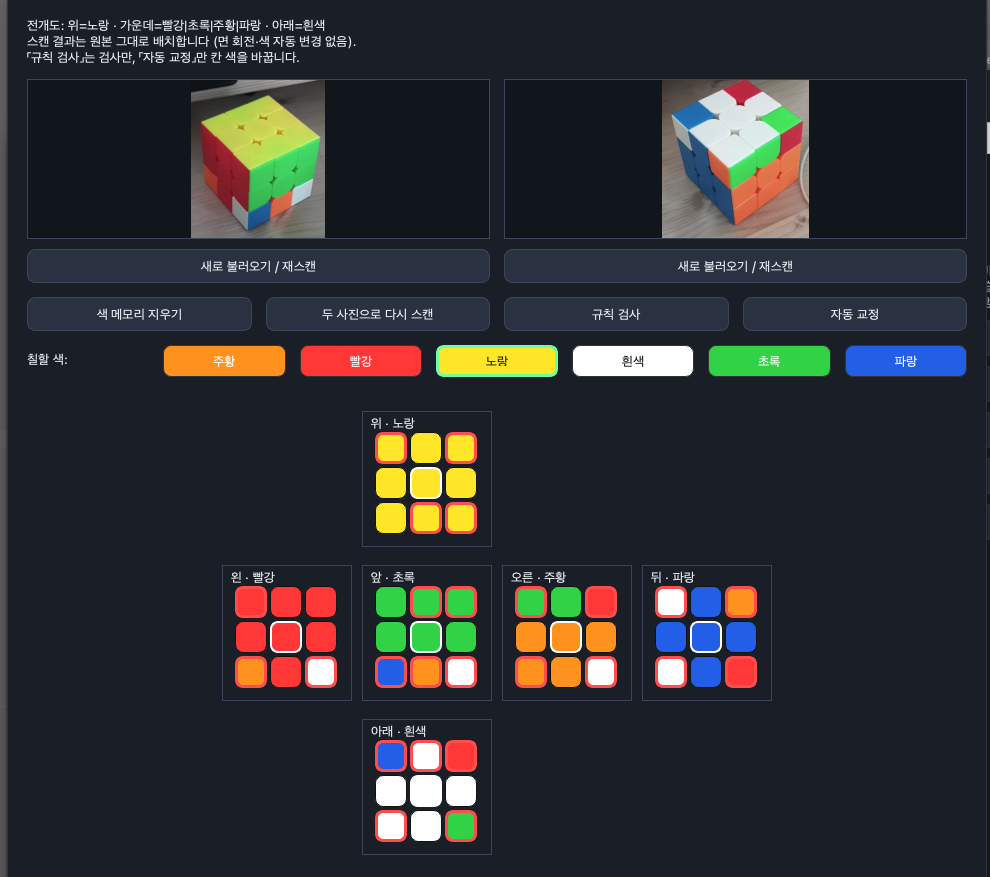
This is the initial screen after reading a photo of the Korean-release cube. The red borders are the stickers that failed the rules.
Solving
Once the rules pass, a Kociemba two-phase search finds the solution. It is not a method people memorise, but an algorithm that uses precomputed tables to find short solutions. It solved all 60 cubes scrambled with 25 moves, with 20.7 moves on average and 22 moves at most. The median time per solve was 6 ms. The ◀ Previous / Next ▶ buttons at the bottom of the screen step through the moves one at a time.
We also built a beginner layer-by-layer solver closer to how people solve. But it solved only 6 of the same 60 (10%), and the ones it solved took 203–311 moves. So the app uses Kociemba first and falls back to other methods only when it fails.
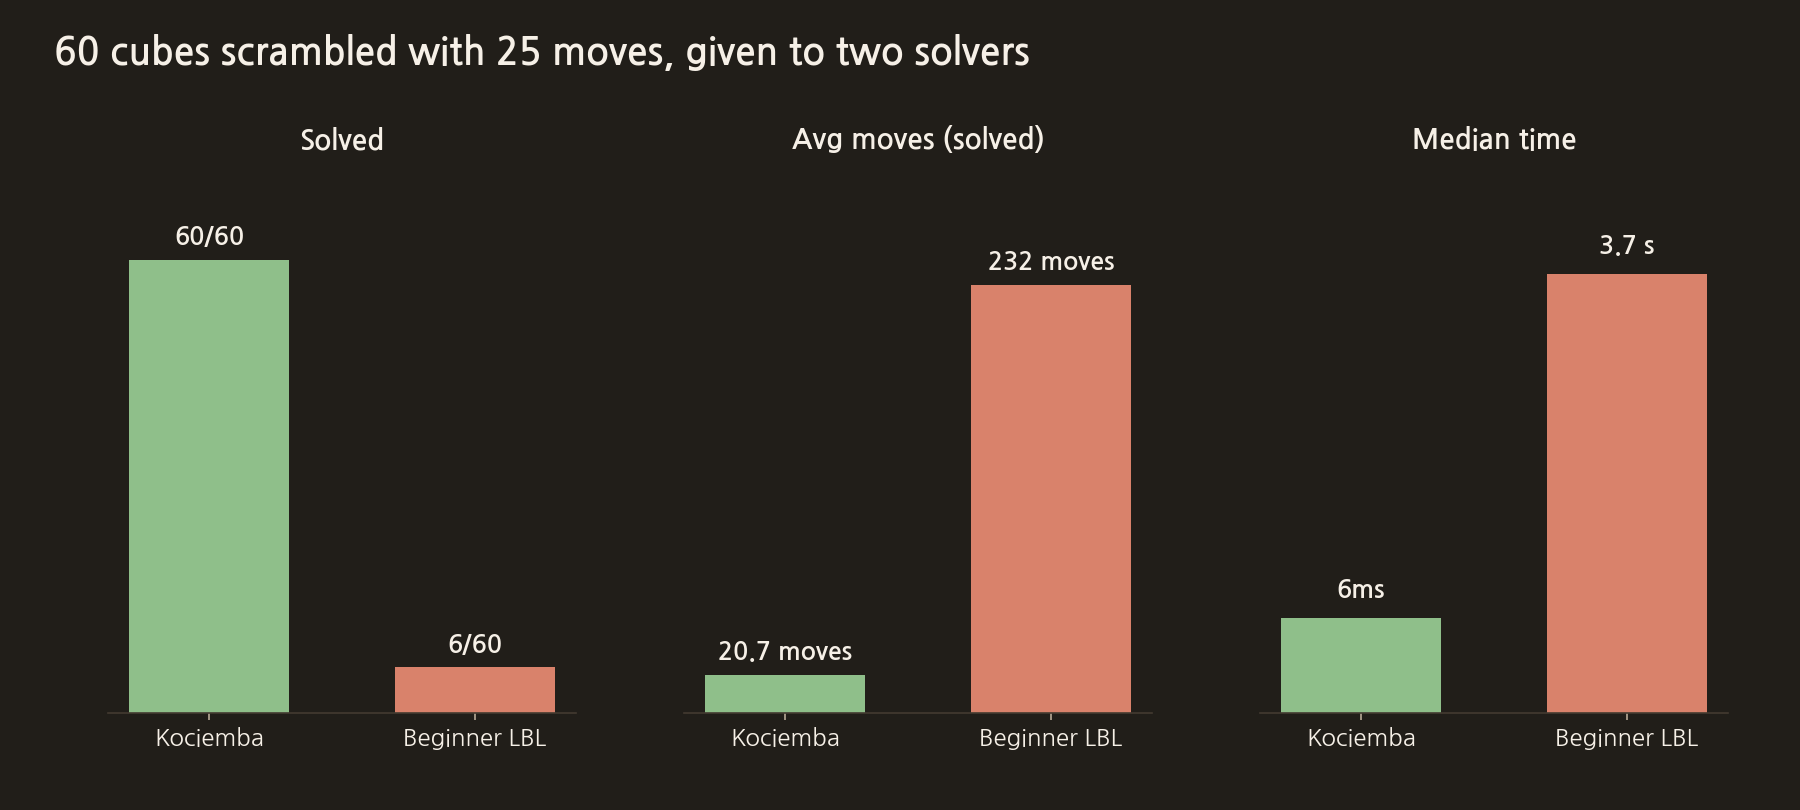
The time chart uses a log scale.
The actual code for this step
This is the corner piece check. If any of the three colours overlap, all three stickers are marked.
src/CubePhotoReconstructor.cpp
// 2) 코너 (8개): 세 면 색은 모두 달라야 하고, 서로 다른 축 색이어야 함
for (int x : {-1, 1}) {
    for (int y : {-1, 1}) {
        for (int z : {-1, 1}) {
            const int fx = (x == 1) ? 0 : 1;
            const int fy = (y == 1) ? 2 : 3;
            const int fz = (z == 1) ? 4 : 5;
            const int cx = colorOnFace(faces, fx, x, y, z);
            const int cy = colorOnFace(faces, fy, x, y, z);
            const int cz = colorOnFace(faces, fz, x, y, z);
            if (cx < 0 || cy < 0 || cz < 0)
                continue;

            if (cx == cy || cy == cz || cx == cz) {
                v.ok = false;
                v.errors << QStringLiteral(
                                "· %1+%2+%3 모서리: 한 조각에 같은 색이 두 면 — "
                                "전개도에서 이 세 칸이 「왼|앞|오른」 접힘에 맞게 붙어 있는지 확인")
                                .arg(QString::fromUtf8(CubeModel::faceNameKo(fx)),
                                     QString::fromUtf8(CubeModel::faceNameKo(fy)),
                                     QString::fromUtf8(CubeModel::faceNameKo(fz)));
                markCell(v, fx, x, y, z);
                markCell(v, fy, x, y, z);
                markCell(v, fz, x, y, z);
            }
Solving calls Kociemba first.
src/Oracle.cpp
// 0) Kociemba two-phase — 임의 스크램블/사진 상태용 확실한 해법
if (!timedOut()) {
    auto koc = KociembaSolver::solve(start, 24, 8);
    if (!koc.empty())
        return compress(koc);
}
The next post is "2. Colour segmentation instead of a VLM, and two cubes with different personalities".
COMMENTS · CHAPTER 01
Building a 3D cube and reading its state from two photos 0 comments
No comments yet. Leave a question or anything you would like to add.
To post a comment, continue with Google and register a nickname and email address.
Continue with Google